Multi-Strand Seed Beads and Larimar Chips Necklace
I can’t remember when I last made a piece of jewelry. I felt like making a necklace today but now I find that I didn’t like the way it looks. What do you think?
Materials:
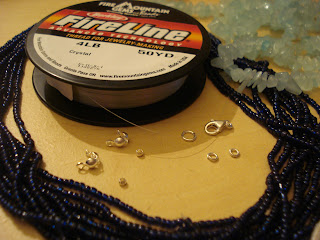
- Thread, Berkley FireLine Crystal, crystal, 0.13mm diameter, 4-pound test.
- Glass seed beads. Size: 10/0. Color of your choice.
- Larimar chips. Color of your choice.
- 2 bead tips, bottom clamp on, double loop, 3.5mm
- 2 crimp beads, 2mm
- 2 open jump rings, 3.55mm x .03mm
- Lobster claw clasp with loop
- Scotch tapes
Tools:
- Bead crimping plier
- Round nose or flat nose plier
- Scissors
Step 1
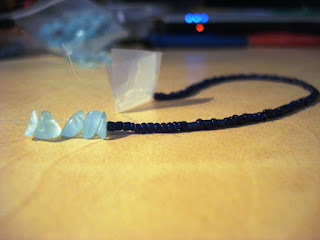
Cut a piece of clear thread 21 inches long and thread 5 larimar chips and glass seed beads until 8 inches are filled, then put a piece of tape at the end to secure it. On the other side, thread only the glass seed beads until 8 inches are filled and then put tape at the end also. The total length is 16 inches long.
Repeat step 1 six more times to make a total of seven strands. You can basically add as many larimar chips as you want for each strand. I put 5, 6, 7, 8, 7, 6, 5 larimar chips from the top to bottom strands, so that all the larimar chips will appear slightly off the center of the necklace.
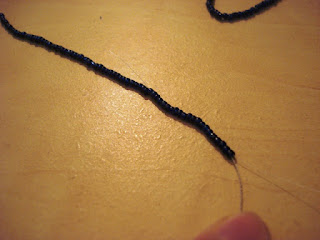
 There are two ways I find that are easier and faster to thread all the tiny little seed beads on the clear thread. You can hold a small amount of seed beads between your thumb and index fingers with the original thread on, then insert the clear thread and go through all the beads, then slide the beads over to the clear thread. Or, you can lay seed beads on the table, and use your left index finger to hold the original thread, then insert the clear thread and slide the beads over to the thread. If you are lucky, sometimes you can thread a lot of beads at the same time.
Step 2
After you’re done making seven strands, choose one end of the strands and take off the tapes. Make sure all the strands are line up, then insert a crimp bead, bead tip and seed bead onto the end of the strands.
Step 3
Tie double knots on a seed bead.
Step 4
The end of the thread goes back through the bead tip and the crimp bead. Pull it tight.
Step 5
Use a bead crimping pliers to flatten the crimp bead and use a flat nose plier to tighten the bead tip with a seed bead hidden inside. Cut off the extra strands. Repeat step 2 – 5 on the other end of the strands.
Step 6
Insert two open jump rings on each side of the bead tip. Then put a lobster clasp on one side and a bigger jump ring on the other side.
Now, you can wear the necklace tomorrow at work, school or everywhere you may go.
When I think of jewelry, there is a Bible verse - Exodus 35:22 All who were willing, men and women alike, came and brought gold jewelry of all kinds: brooches, earrings, rings and ornaments. They all presented their gold as a wave offering to the LORD.
During this tough economic time, it is very easy (or should I say tempting) for me to not give an offering at church. All the money that I gave, I would rather use on paying my tuition or putting it into my saving account. But I know if I don’t offer my tithe, I will be stealing from Him. I just need to trust Him that He is my provider who always knows what I need.


Comments
Did you make the necklace? You must have very fine fingers. Isn’t it tedious work? It is so beautiful. You can sell those things. How many did you make? At Ginza Holiday many those hand-made was sold.
I love to work with beads, too. I used the beads to make crochet necklace or handbags.
Thank you for share your thought. Hiroko from the House of Rock